In my previous article, I talked about “What is ARC by SourceFuse?”. In this article, I will show you how to set up and use ARC pre-built microservices, following an easy-to-follow step-by-step process.
As a reminder, ARC by SourceFuse enables you to quickly develop microservices and APIs. It is built on LoopBack which is an award-winning, highly extensible, open-source Node.js and TypeScript framework based on Express.
Discover ARC by SourceFuse
The tech stack you will be using in this process is NodeJS, ExpressJS, LoopBack v4, and Typescript. However, you won’t need expertise in all of these frameworks – you will just need expertise in NodeJS and Loopback4. A basic understanding of syntax and patterns in Typescript is enough here, and even if you don’t know ExpressJS at all it will work.
Following the seven steps below, let’s see how we can initialize and set up a new microservices-based API codebase with ARC’s authentication service as one of the services.
Step 1: Install NodeJS
Install the latest NodeJS latest LTS version — https://nodejs.org/en/download/.
Step 2: Install Loopback CLI
LoopBack provides a very useful command line utility that very easily helps in developing applications, models, services, etc. as a boilerplate, which saves a lot of time. So, go ahead and install @loopback/cli.
npm i -g @loopback/cli
Step 3: Install ARC CLI
Similar to LoopBack, ARC also provides a useful command line utility that helps in the quick scaffolding of monorepo (for microservices), individual services, extensions, etc. So, let’s install @sourceloop/cli.
npm i -g @sourceloop/cli
Step 4: Scaffold a Monorepo for Microservices
We recommend using a monorepo strategy for maintaining all the microservices, as it helps avoid the clutter of too many repositories to manage and maintain.
Some good reads to understand this recommendation:
- https://fourtheorem.com/monorepo/
- https://semaphoreci.com/blog/release-management-microservices
- https://danoncoding.com/monorepos-for-microservices-part-1-do-or-do-not-a7a9c90ad50e
We will first scaffold a monorepo with a basic structure and with Lerna installed as a monorepo manager.
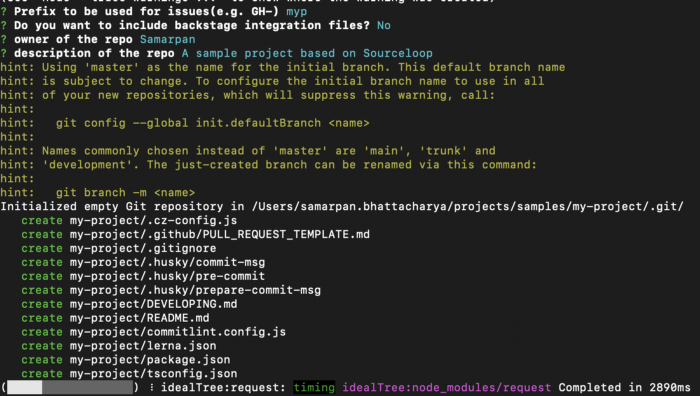
sl scaffold my-project
You will be asked several prompts, as follows:

- Prompt #1 – Prefix is used by scaffold to set up commit message linting, checks using commitizen to ensure conventional commit message guidelines are followed. This could be your project key from Jira using which you can also integrate Smart Commits of Jira.
- Prompt #2 – ARC provides backstage integration too. But this is optional.
- Prompt #3 – Author / Owner of the repo. This will go into package.json.
- Prompt #4 – Description of the repo. This will go into package.json.
After this, it will take a few minutes to set everything up:
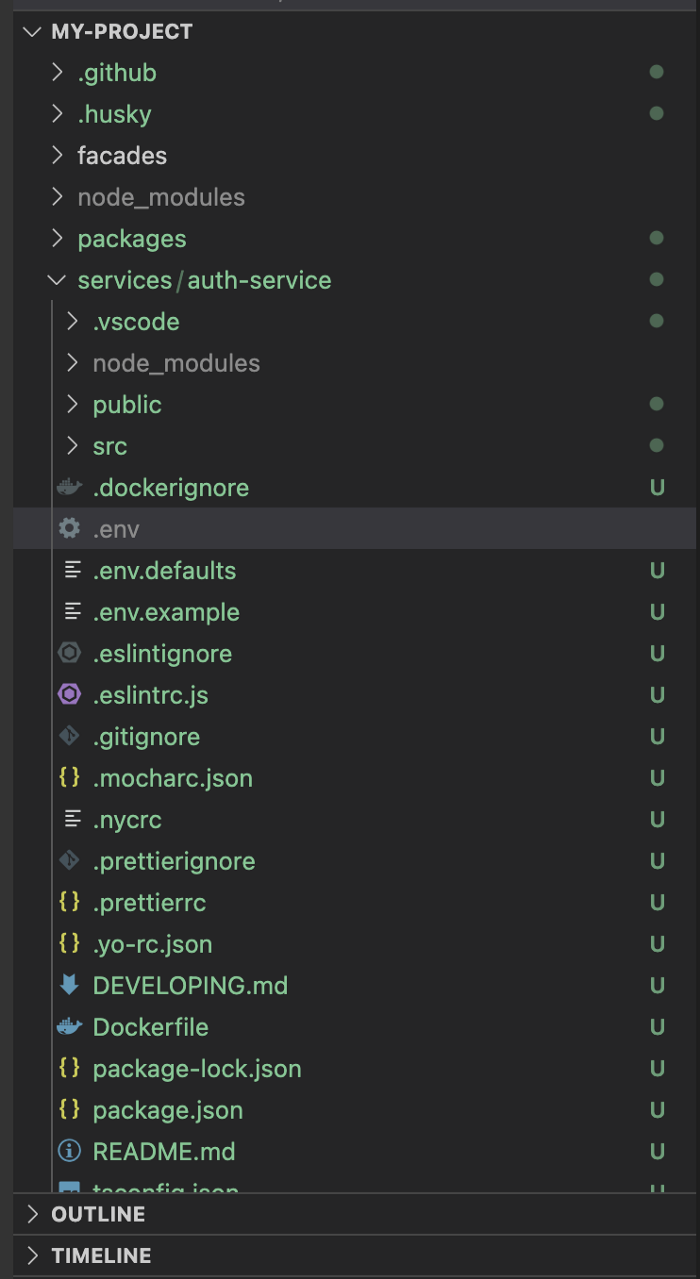
Once this is done, you will see a folder structure generated as in the example below.
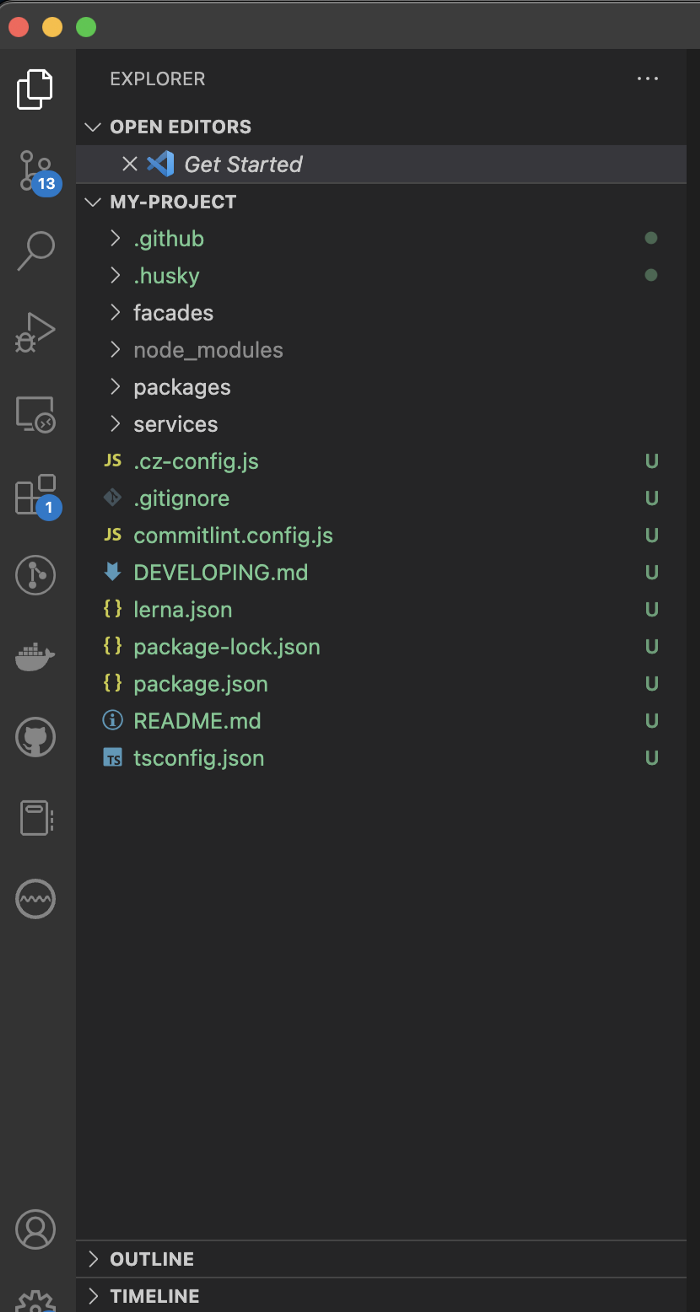
As you can see, scaffold has initialized and set up a lot, such as:
- GitHub PR template inside .github
- Conventional commits enablement using commitizen (.cz-config.js), commitlint (commitlint-config.js) and husky for githooks
- .gitignore for ignoring files from source code. Important for secure coding and keeping the repo clean on SCM (git)
- lerna.json which contains the setup for lerna commands. Lerna is going to be our monorepo manager and build tool going forward. It is one of the most popular monorepo managers in the industry, used by Jest, NestJS, LoopBack, and Nx
- package.json and package-lock.json for npm to work
- Three folders named facades, packages and services:
- Facades will hold facade microservices. These are based on aggregator patterns in microservices composition
- Packages will hold a reusable library, extensions etc. which are needed by multiple microservices
- Services will hold the actual microservices and will always be completely independent of their own database i.e., one DB per service pattern.
Step 5: Change your working directory
Now that you have scaffolded a monorepo successfully, you need to change your working directory to the root of your monorepo.
cd my-project
Step 6: Create an Authentication Microservice
Now it’s time to set up our first microservice – auth-service.
sl microservice auth-service
Again, you will be asked several prompts, as follows:
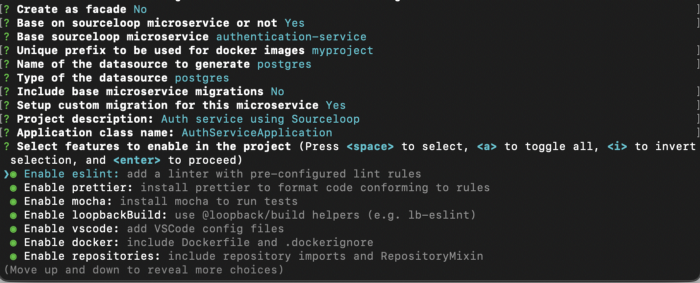
- Prompt #1 – Whether this is a facade microservice or a base microservice
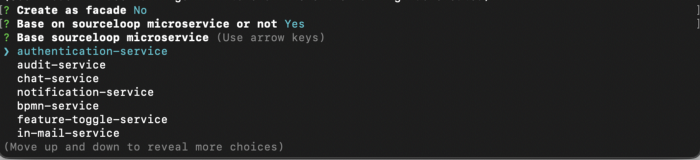
- Prompt #2 – Whether this microservice is based on an ARC microservice or is an independent one like the project-management-service in our list above. We selected ‘Yes’ because we are using ARC’s authentication service.
- Prompt #3 – Select which ARC microservice you want from the list if ‘Yes’ was selected in the previous prompt
- Prompt #4 – Unique prefix for docker images built for this service. Yes, it already supports docker containers and their CI / CD-related commands are part of package.json scripts.
- Prompt #5 – Datasource name for DB connection.
- Prompt #6 – Datasource type. ARC currently supports PostgreSQL and MySQL.
- Prompts #7 & #8 – Whether to utilize underlying database migrations provided by ARC or use custom migrations. In case of custom migrations, a new folder will be created inside the packages folder named migrations. Custom migrations provide more flexibility and are recommended for production applications.
- Prompts #9 & #10 – Description and class name to configure in service.
- Prompt #11 – Setup features needed. These features are provided by LoopBack CLI itself and ARC CLI just exposes it i.e., all the feature support is based on LoopBack.
Once this is done, you will be prompted with something like this.

That’s all! You are almost ready to run your microservice with pre-built APIs.
Step 7: Set up Environment Variables
The final step before running your server is to set up your environment variables in the .env file. All of the possible env variables available are defined in a file .env.example. Referring to that, you can create a .env file at the same level and provide values.
Step 8: Run the Server
Go to the terminal and change the directory into your service folder:
npm start
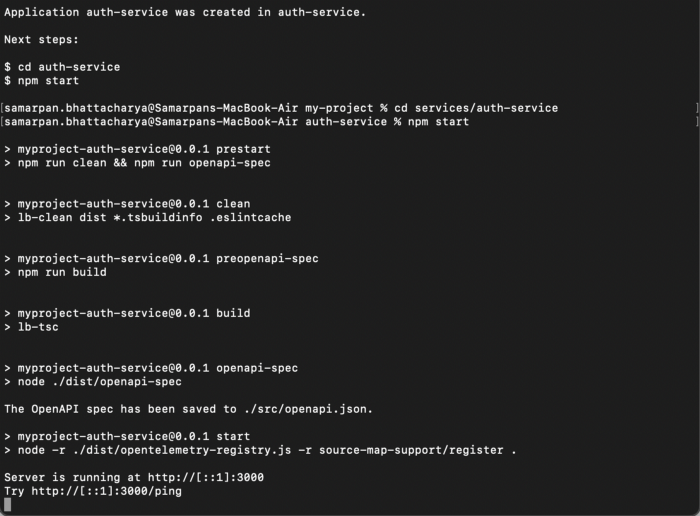
Open http://[::1]:3000/.
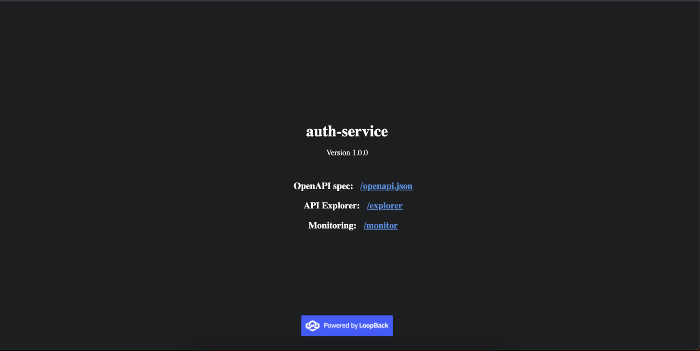
Voila! The service is up and running. As you can see, this service comes with open api spec, an open api explorer and monitoring enabled by default.
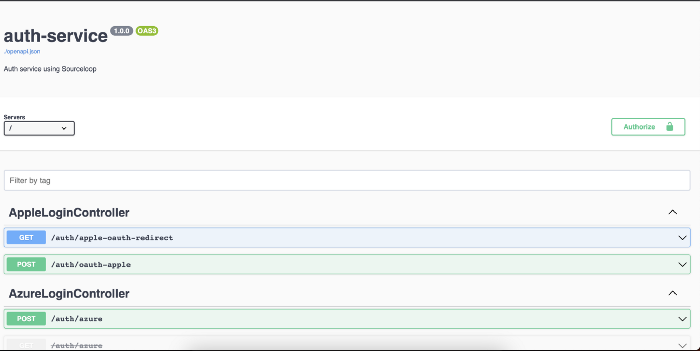
Clicking on ‘explorer’ opens up the following:
You have even got ready-made APIs already connected with DB.
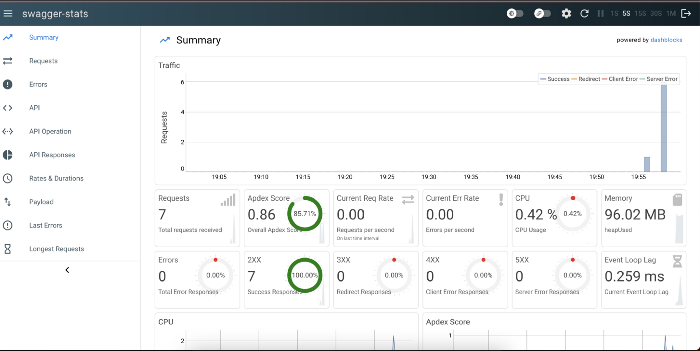
Clicking on ‘monitor’ opens up swagger-stats, which provides monitoring capabilities to the microservice:
As you can see, with just a few basic commands and steps, you are able to scaffold an entire repo and one pre-built microservice. Similarly, you can add any other ARC microservice as well using an sl microservice command.
Is ARC Only Suitable for Microservices-based Applications or Products?
No. All of the ARC microservices can be used in a monolithic application as well. The only prerequisite is that a monolithic application should be built using LoopBack4.
With that, you can simply do the below commands to get all APIs ready for both the services above – you just need to set up their environment variables separately.
npm install @sourceloop/authentication-service
npm install @sourceloop/notification-service

